Advanced Python Techniques: File Management Introduction Updating Plan
Today, we will introduce how to manage files (such as reading files and writing files) in Python.
Abstract Table of Contents Import Modules 在Python中,模块(Module) 是一个包含Python代码的文件,通常以 .py 为扩展名。模块可以包含函数、类、变量和可执行代码。
Basic Grammer 导入模块最常用的命令是import命令,我们可以使用import命令导入Python中的第三方模块 。(类似于C++中的#include命令)
在导入模块的过程中,有如下的四种方法:
1 2 3 4 5 6 7 8 9 10 11 12 13 14 15 16 17 18 19 20 21 22 23 24 25 26 27 28 29 30 31 import math16 )print (result) from math import sqrt16 )print (result) from math import *16 )print (result) import math as m16 )print (result) from math import sqrt as square_root16 )print (result)
Import Class 为了提升代码的简洁性,类的定义 被储存在特定的文件中,在开发者使用是可以被特定的导入
1 2 3 4 5 6 7 8 9 10 11 12 13 14 15 16 17 18 19 20 21 22 class Car :def __init__ (self ):pass class Bike :def __init__ (self ):pass class Truck :def __init__ (self ):pass import All_the_classfrom All_the_class import Carfrom All_the_class import Bike,Car
Dive Deeper
How do Python import modules? 当你导入一个模块时,Python 会按照以下顺序查找模块:
内置模块 :Python 自带的标准库模块。当前目录 :运行脚本所在的目录。**环境变量 PYTHONPATH**:包含目录列表的环境变量。 安装的第三方库 :通过 pip 安装的第三方模块。当前目录 是指该文件所在的目录地址,例如下面的文件结构:
thefilefoldertestcode1.py对于testcode2.py来说,当前目录下有文件testcode3.py,而没有testcode1.py。
PYTHONPATH 允许你添加自定义的目录路径
自定义模块路径 :当你有一些自定义的模块不在当前目录或 Python 的标准库路径中时,可以通过 PYTHONPATH 指定这些模块所在的目录。项目结构管理 :在大型项目中,模块可能分布在不同的目录中,通过 PYTHONPATH 可以方便地管理这些模块的路径。
从上文可知,文件的导入并不局限于官方库文件的导入,你也可以导入自己写的Python文件 !
__name__我们来看下面的例子,这是在同一个目录下的两个Python文件testcode4.py和testcode5.py:
1 2 3 4 5 6 print ("Hello! This is the file testcode5.py!" )import testcode5print ("Hello! this is testcode4.py" )
运行testcode4.py,输出结果如下:
1
2
Hello! This is the file testcode5.py!this is testcode4.py
实际上,Python解释器运行代码的顺序和逻辑如下:
**运行 testcode4.py**:
Python 解释器开始执行 testcode4.py 文件。
当遇到 import testcode5 时,Python 会查找并加载 testcode5.py 模块。
**加载并执行 testcode5.py**:
Python 会执行 testcode5.py 文件中的所有顶层代码(即不在函数或类中的代码) 。
在 testcode5.py 中,print("Hello! This is the file testcode5.py!") 是顶层代码,因此会被执行。
执行完 testcode5.py 后,Python 会回到 testcode4.py 继续执行。
**继续执行 testcode4.py**:
在 testcode4.py 中,import testcode5 已经完成,接下来执行 print("Hello! this is testcode4.py")。
因此,testcode4.py 中的 print 语句会被执行。
这就出现了很尴尬的问题,我们设置print语句的初衷是告知程序员现在在运行哪一个文件,我们不希望模块被导入的输出相同的结果 ,换句话说,我们希望将一个程序作为模块被导入运行和直接运行 的行为产生差异。
这是一个很实际的问题,模块的使用者直接导入模块,而模块的开发者需要调试信息,就需要这样一种分离 的策略。
一种方法是将所有的代码写成函数,这样不存在顶层代码一说了 ,但是这对模块开发和调试的功能有增添了不便之处。实际上,每个文件都有一个**__name__ 属性**,灵活使用__name__可以很好的解决这个问题。
我们略微修改刚刚的代码:
1 2 3 4 5 6 7 8 9 10 11 12 13 14 15 16 17 18 19 20 print ("Hello! This is the file testcode5.py!" )print (f"testcode5 __name__: {__name__} " )import testcode5print ("Hello! this is testcode4.py" )print (f"testcode4 __name__: {__name__} " )''' when you run testcode5.py: Hello! This is the file testcode5.py! testcode5 __name__: __main__ when you run testcode4.py: Hello! This is the file testcode5.py! testcode5 __name__: testcode5 Hello! this is testcode4.py testcode4 __name__: __main__ '''
我们很惊喜的发现,被导入的文件 和直接被运行的文件 的__name__属性是不一样的!当一个文件被导入的时候,__name__字符串的值就是其文件名(例如testcode5),而被直接运行的时候,__name__的值变成了__main__。
因此,我们可以使用if __name__ == "__main__"语句来封装顶层代码 ,实现我们上文的需求!
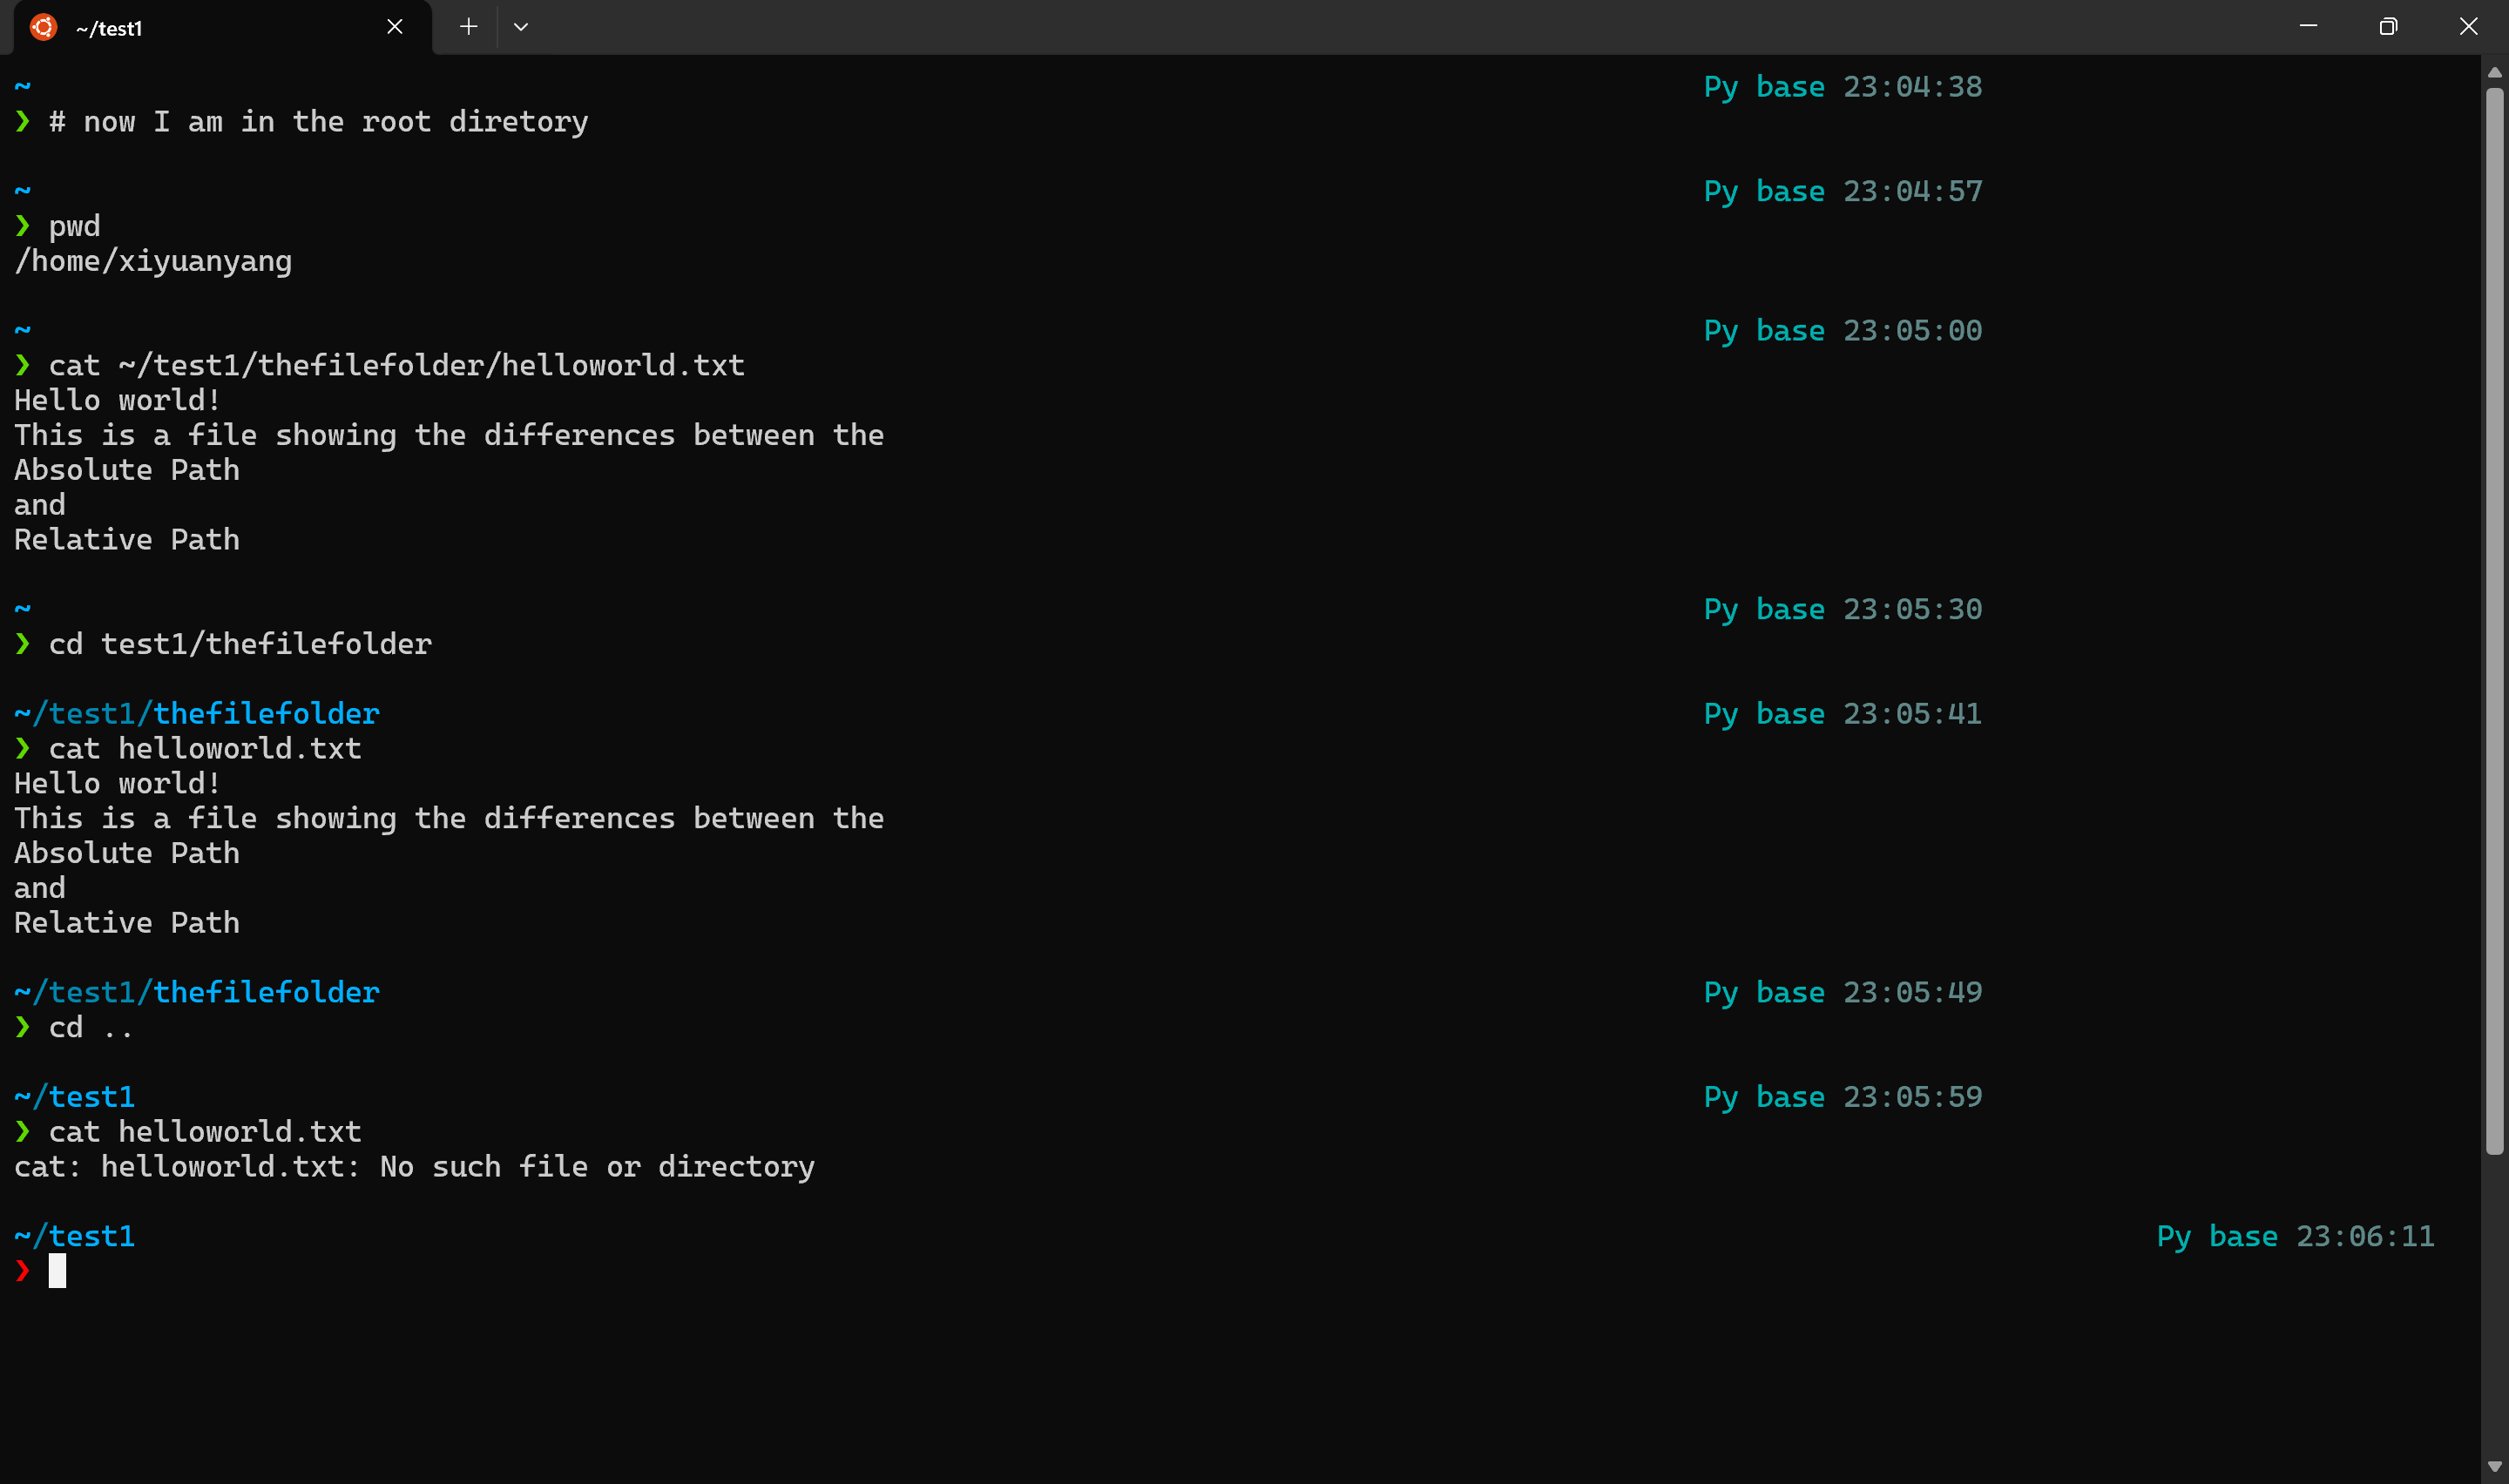
File Reading and Writing What is path? 路径(path) 是指文件或文件夹在系统中的准确位置,类似于每家每户的门牌号 。当Python想要读取一个文件时,首先需要获得文件的地址(即路径) ,这样文件才能被找到并被成功读取。
路径分为两类,相对路径 和绝对路径 。
绝对路径是从文件系统的根目录开始的完整路径,它唯一地标识一个文件或目录的位置。
相对路径是相对于当前工作目录的路径,它依赖于当前的工作环境。
通俗一点来说,如果我们要描述小明的绝对路径,我们要从根目录 (不妨假设为地球)开始说,小明住在哪个大洲哪个国家哪个区域哪个街道哪个门牌号…但如果我站在当前工作目录 (不妨假设为地球/亚洲/中国),我们可以直接从小明住在哪个区域开始说起就行了。但是如果远在美洲的朋友就无法识别这个相对路径(因为当前工作目录发生了改变 )。
pathlibpathlib 是 Python 3.4 引入的一个模块,提供了一种面向对象的方式来处理文件系统路径。
pathlib 的核心类是 Path,它表示文件系统路径。Path 类有两种主要子类:
**PurePath**:纯路径类,只处理路径字符串,不涉及实际文件系统操作。
**Path**:具体路径类,继承自 PurePath,可以执行实际的文件系统操作(如创建文件、读取文件等)。
创建 Path 对象
1
2
3
4
5
from pathlib import Path'example.txt' )print (p)
路径拼接
使用 / 运算符可以轻松拼接路径。
1
2
3
p = Path('/path/to' )'subdir' / 'file.txt' print (p)
获取路径的组成部分
1
2
3
4
5
6
7
p = Path('/path/to/file.txt' )print (p.name) print (p.stem) print (p.suffix) print (p.parent) print (p.absolute())
检查路径是否存在
1
2
3
4
5
6
p = Path('example.txt' )if p.exists():print ("文件存在" )else :print ("文件不存在" )
创建文件和目录
1 2 3 4 5 6 7 'new_file.txt' )'new_directory' )True )
读取和写入文件
1 2 3 4 5 6 7 8 9 10 11 12 'example.txt' )'Hello, World!' )open (mode='a' ).write("Hello" )print (content)
我们还可以实现一些更高级的操作:
1
2
3
4
5
6
7
8
9
from pathlib import Path"example.txt" )for i,line in enumerate (lines):print (f"The {i+1 } line is {line} " )
1
2
3
The 1 line is hello my name is van2 line is i am an artist3 line is a performance artist
遍历目录
1
2
3
p = Path('.' )for file in p.iterdir():print (file)
查找文件
1 2 3 for file in p.glob('*.txt' ):print (file)
删除文件或目录
1 2 3 4 5 6 7 'example.txt' )'empty_directory' )
10.获取当前文件目录(这里使用了os 库)
1
2
3
4
5
6
7
8
9
10
11
import osfrom pathlib import Pathprint (f"当前工作目录: {cwd} " )print (f"当前工作目录: {cwd_path} " )
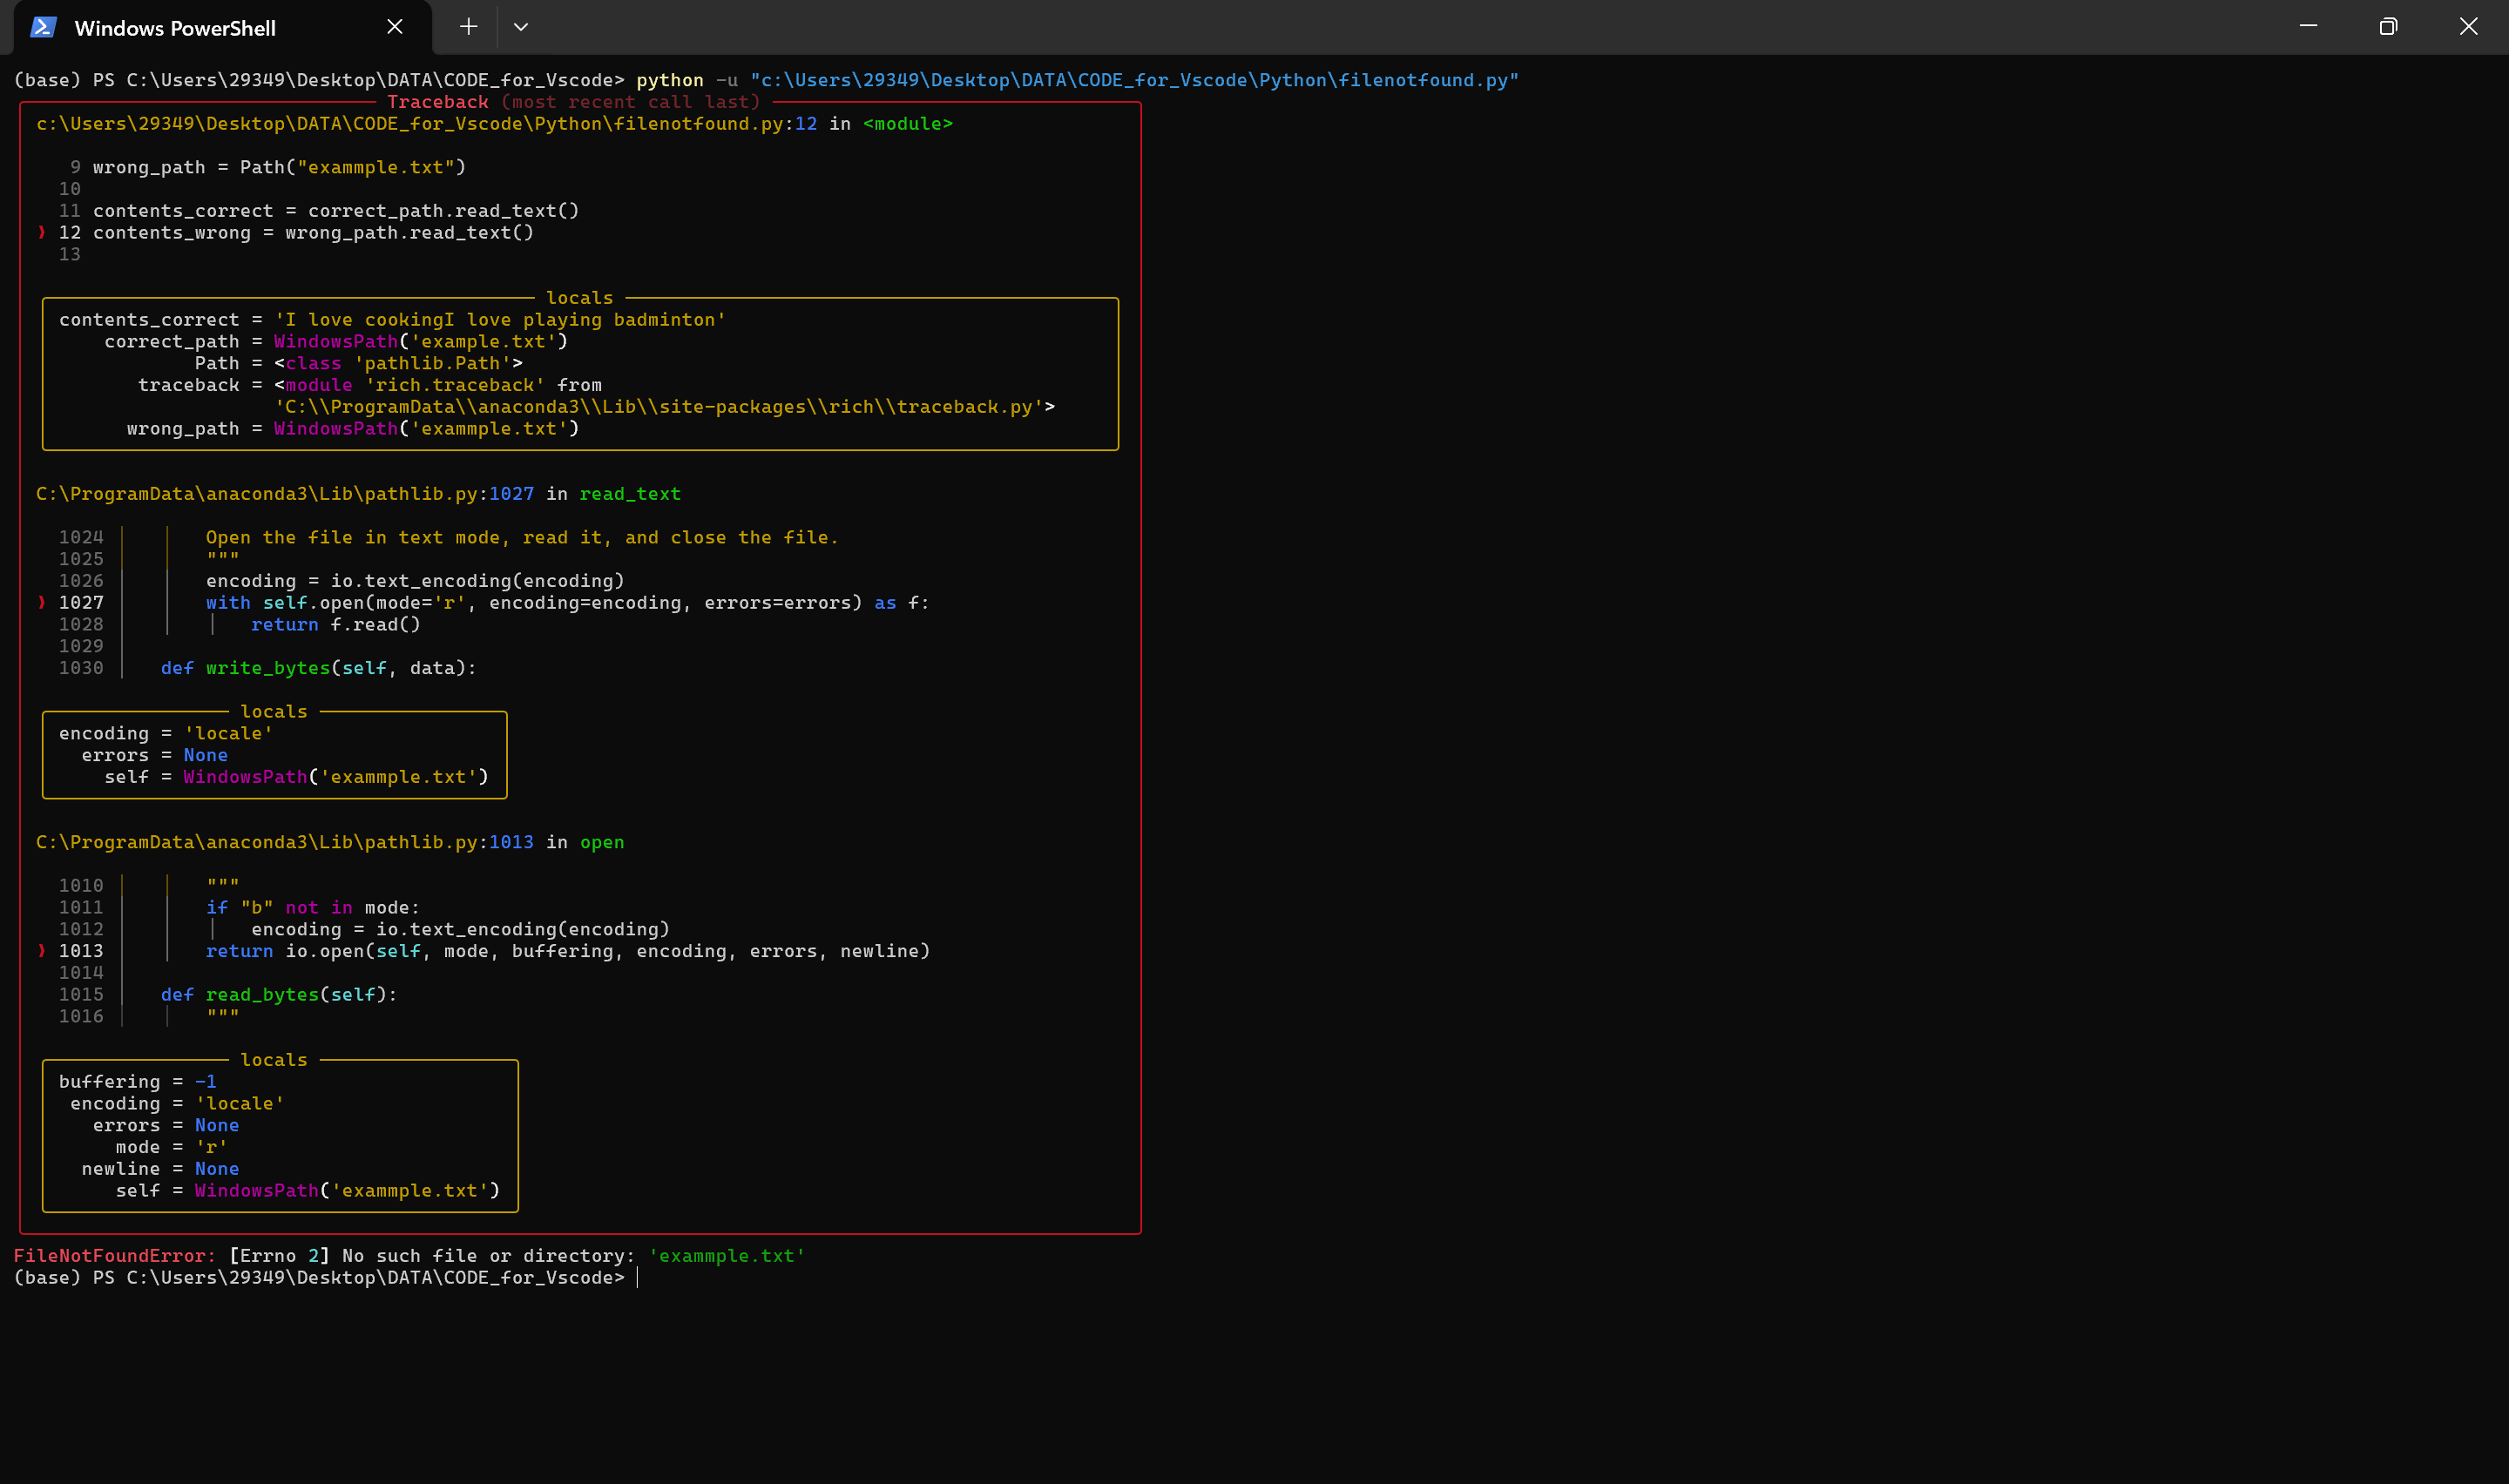
FileNotFoundError当我们进行文件操作时,一不小心可能会拼错或者搞错了文件的路径,导致程序无法找到对应的文件 。
例如,如下程序的目录中有文件example.txt,但没有exammple.txt。
1
2
3
4
5
6
7
8
9
10
11
12
from pathlib import Pathfrom rich import tracebackTrue )"example.txt" )"exammple.txt" )
程序的输出结果如下:
归根结底就一句话:FileNotFoundError: [Errno 2] No such file or directory: 'exammple.txt'。
和C++一样,Python也有异常处理 的机制。FileNotFoundError 是 Python 中的一个内置异常类 ,用于表示程序尝试访问一个不存在的文件或目录时抛出的错误。它是 OSError 的子类(在 Python 3.3 之前是 IOError 的子类),专门用于处理文件未找到的情况。
在C++中,我们可以使用try-catch块来捕获异常,保证其他程序的正常运行,在Python中,try-except块也发挥了类似的作用。
1
2
3
4
5
6
7
8
9
10
11
12
13
14
15
16
from pathlib import Pathfrom rich import tracebackTrue )"example.txt" )"exammple.txt" )try :except FileNotFoundError:print ("Haha,File not found!" )
再次运行程序,就不会出现traceback报错,而只会输出:Haha,File not found!
Data Storage:JSON What is JSON ? JSON 文件 是一种用于存储和交换数据的文件格式 ,全称是 JavaScript Object Notation (JavaScript 对象表示法)。它的设计目标是易于人类阅读和编写,同时也易于机器解析和生成。
JSON 文件的内容是由 “键值对” 组成的,就像字典一样。是一种轻量级的数据格式。
1
2
3
4
5
6
7
8
9
10
{ "name" : "Alice" , "age" : 25 , "isStudent" : false , "courses" : [ "Math" , "Science" , "History" ] , "address" : { "city" : "Beijing" , "postalCode" : "100000" } }
JSON文件最强大的用处在于数据的传输和存储 ,例如前后端之间API的调用、软件的配置信息、存储结构化数据(日志,用户信息)等等。
JSON in Python在Python中,也可以使用json模块来进行文件管理。
将 Python 对象转换为 JSON 字符串
使用 json.dumps() 可以将 Python 对象(如字典、列表)转换为 JSON 格式的字符串。
1
2
3
4
5
6
7
8
9
10
11
12
13
14
15
16
17
18
19
20
from pathlib import Pathimport json"name" : "小红" ,"age" : 20 ,"isStudent" : False ,"favoriteFoods" : ["火锅" , "冰淇淋" ]4 , ensure_ascii=False )print (json_string)"data.json" )"utf-8" )
1
2
3
4
5
6
7
8
9
{ "name" : "小明" , "age" : 18 , "isStudent" : true , "hobbies" : [ "打篮球" , "听音乐" ] }
**indent=4**:让 JSON 字符串格式化输出,缩进 4 个空格。
**ensure_ascii=False**:确保非 ASCII 字符(如中文)正常显示。
将 JSON 字符串转换为 Python 对象
使用 json.loads() 可以将 JSON 格式的字符串转换为 Python 对象(如字典、列表)。
1
2
3
4
5
6
7
8
9
10
11
from pathlib import Pathimport json"data.json" )"utf-8" )print (data["name" ]) print (data["favoriteFoods" ])
Usage: User_info management 学会了json的基本操作后,我们可以实现一个迷你数据库 :用来存储用户的数据,进行读写等操作。
1
2
3
4
5
6
7
8
9
10
11
12
13
14
15
16
17
18
19
20
21
22
23
24
25
26
27
28
29
30
31
32
33
34
35
36
37
38
39
40
41
42
43
44
45
46
47
48
from pathlib import Pathimport jsoninput ("Hello! What is your name? " )"user_info.json" )if user_name_path.exists():"utf-8" )False None for user in all_user_data:if user.get("name" ) == user_name:True break if user_exists:print (f"Welcome Back, {user_name} !" )print (f"Your favourite food is {user_info.get('food' )} " )else :print (f"Hello {user_name} ! It seems that you are new here." )input ("What is your favourite food? " )"name" : user_name,"food" : fav_foodwith open ("user_info.json" , "w" , encoding="utf-8" ) as json_file:False , indent=4 )print ("Your information has been saved. Welcome!" )
这样的Python代码习惯实在是太差了! 下面是对函数体封装后的优化写法:
1
2
3
4
5
6
7
8
9
10
11
12
13
14
15
16
17
18
19
20
21
22
23
24
25
26
27
28
29
30
31
32
33
34
35
36
37
38
39
40
41
42
43
44
45
46
47
48
49
50
51
52
53
54
55
56
57
58
59
60
61
62
63
64
65
66
67
68
69
70
71
72
73
74
75
from pathlib import Pathimport jsondef load_user_data (file_path ):""" 从 JSON 文件加载用户数据。 如果文件不存在,返回空列表。 """ if file_path.exists():try :with open (file_path, "r" , encoding="utf-8" ) as file:return json.load(file)except json.JSONDecodeError:print (f"错误:文件 {file_path} 不是有效的 JSON 文件!" )return []else :return []def save_user_data (file_path, data ):""" 将用户数据保存到 JSON 文件。 """ with open (file_path, "w" , encoding="utf-8" ) as file:False , indent=4 )def find_user_by_name (users, name ):""" 在用户列表中查找指定名字的用户。 如果找到,返回用户信息;否则返回 None。 """ for user in users:if user.get("name" ) == name:return userreturn None def register_new_user (users, name ):""" 注册新用户并返回更新后的用户列表。 """ print (f"Hello {name} ! It seems that you are new here." )input ("What is your favourite food? " )"name" : name, "food" : fav_food}print ("Your information has been saved. Welcome!" )return usersdef main ():""" 主程序逻辑。 """ "user_info.json" )input ("Hello! What is your name? " )if user_info:print (f"Welcome Back, {user_name} !" )print (f"Your favourite food is {user_info.get('food' )} " )else :if __name__ == "__main__" :
Project: Data Visualization Chapter 15 Data_Creation MatplotlibPython的强大之处之一在于其活跃的社区生态 ,通过pip install他人的第三方库,我们可以实现更多强大的功能,接下来的章节笔者将重点介绍Matplotlib的使用。
这一章的学习非常有趣,强烈建议初学者一起上手操作。
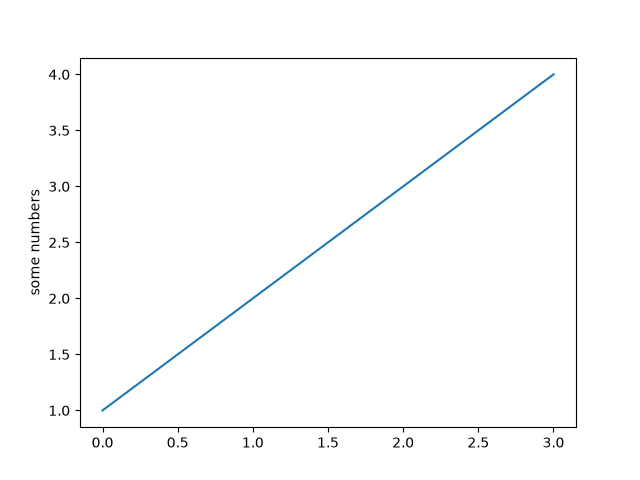
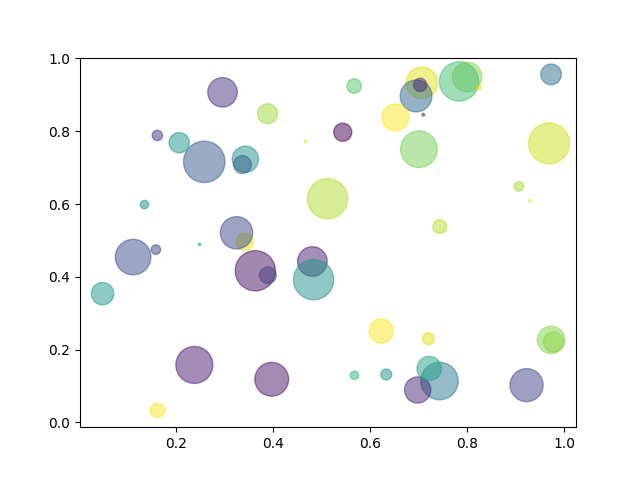
Matplotlib 是 Python 中最流行的数据可视化库之一,广泛用于创建静态、动态和交互式的图表。它提供了类似于 MATLAB 的绘图接口,简单易用且功能强大。以下是 Matplotlib 的简单介绍和基本用法:
(1) 绘制简单的折线图
1
2
3
4
5
6
7
8
9
10
11
12
13
14
15
16
import matplotlib.pyplot as plt1 , 2 , 3 , 4 , 5 ]2 , 3 , 5 , 7 , 11 ]"Simple Line Plot" )"X-axis" )"Y-axis" )
(2) 绘制散点图
1
2
3
4
5
6
7
8
9
10
11
12
13
14
15
16
17
import matplotlib.pyplot as plt1 , 2 , 3 , 4 , 5 ]2 , 3 , 5 , 7 , 11 ]10 )"Scatter Plot" )"X-axis" )"Y-axis" )
(3) 绘制柱状图
1
2
3
4
5
6
7
8
9
10
11
12
13
14
15
16
import matplotlib.pyplot as plt'A' , 'B' , 'C' , 'D' ]10 , 20 , 15 , 25 ]"Bar Chart" )"Categories" )"Values" )
(4) 绘制饼图
1
2
3
4
5
6
7
8
9
10
11
12
13
14
import matplotlib.pyplot as plt'A' , 'B' , 'C' , 'D' ]15 , 30 , 45 , 10 ]'%1.1f%%' )"Pie Chart" )
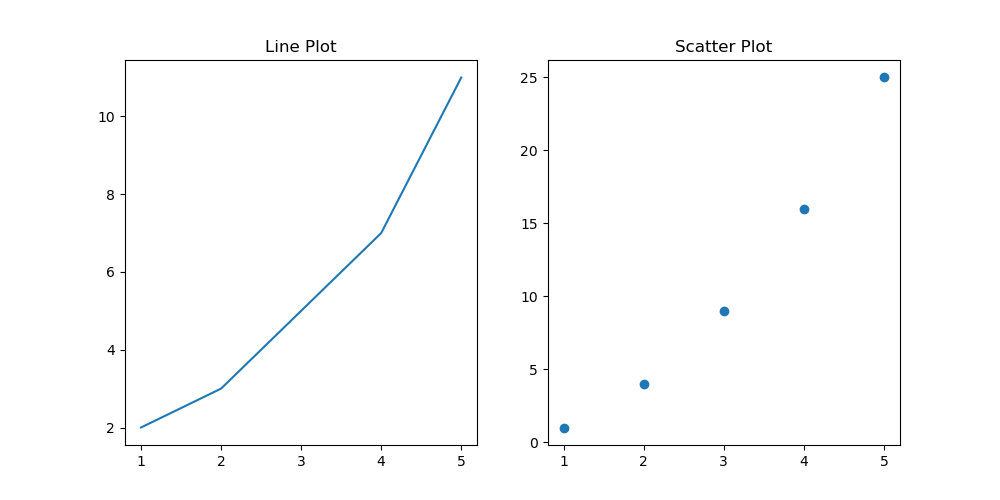
使用 plt.subplots 可以在一个窗口中绘制多个子图。
1
2
3
4
5
6
7
8
9
10
11
12
13
14
15
16
17
18
19
20
import matplotlib.pyplot as plt1 , 2 , 3 , 4 , 5 ]2 , 3 , 5 , 7 , 11 ]1 , 4 , 9 , 16 , 25 ]1 , 2 , figsize=(10 , 5 ))"Line Plot" )"Scatter Plot" )
Matplotlib 支持丰富的自定义选项,例如颜色、线型、标记等。
1
2
3
4
5
6
7
8
9
10
11
12
13
14
15
16
17
import matplotlib.pyplot as plt1 , 2 , 3 , 4 , 5 ]2 , 3 , 5 , 7 , 11 ]'red' , linestyle='--' , marker='o' , label='Data' )"Customized Line Plot" )"X-axis" )"Y-axis" )
使用 plt.savefig 可以将图表保存为图片文件。
1
2
3
4
5
6
7
8
9
10
11
import matplotlib.pyplot as plt1 , 2 , 3 , 4 , 5 ]2 , 3 , 5 , 7 , 11 ]"line_plot.png" )
也可以使用内置样式 :
1
2
3
4
import matplotlib.pyplot as pltprint (plt.style.available)
1
2
3
4
5
6
7
8
9
10
11
12
13
14
15
16
17
18
19
20
21
22
import matplotlib.pyplot as plt'seaborn-v0_8-dark' )1 , 2 , 3 , 4 , 5 ]2 , 3 , 5 , 7 , 11 ]"Data" )"Line Plot with Seaborn Darkgrid Style" )"X-axis" )"Y-axis" )
Matplotlib提供了很多自定义的设置,例如ticklable_format(style=)来设置刻度标记 ,自定义RGB颜色color=(0,0.8,0)
Application:Random Walk 下文给出实现Random Walk 的Python代码:
1
2
3
4
5
6
7
8
9
10
11
12
13
14
15
16
17
18
19
20
21
22
23
24
25
26
27
28
29
30
31
32
33
34
35
36
37
38
39
40
41
42
43
44
45
46
47
48
49
50
51
52
53
54
55
56
57
58
59
60
61
62
63
64
65
66
67
68
69
70
from random import choiceimport matplotlib.pyplot as pltfrom tqdm import tqdmclass RandomWalk :'''A class represents the random walk''' def __init__ (self, num_points=500 ):self .num_points = num_pointsself .x_values=[0 ]self .y_values=[0 ]def fill_walk (self ):while len ((self .x_values))<self .num_points:1 ,-1 ])0 ,1 ,1 ,1 ,1 ,1 ,1 ,2 ,3 ,4 ])1 ,-1 ])0 ,1 ,1 ,1 ,1 ,1 ,1 ,2 ,3 ,4 ])if x_step==0 and y_step==0 :continue self .x_values[-1 ] + x_stepself .y_values[-1 ] + y_stepself .x_values.append(x_new)self .y_values.append(y_new)def imitate_walk (index ):10000 'classic' )list (range (Total_steps))'none' , s=2 )'none' , s=2 )'none' , s=2 )'equal' )False )False )f'Random Walk{index+1 } ' , fontsize=16 , fontweight='bold' )f'Random_walk{index+1 } .png' , bbox_inches='tight' )def main ():for i in tqdm(range (1000 )):if __name__ == '__main__' :'''The main function'''
这个代码会实现1000次的Random_Walk,其中每一次的步长为10000。最后画出的图片效果还是非常震撼的!
Chapter 16 Download Data CSV CSV(Comma-Separated Values,逗号分隔值)是一种简单的文件格式,用于存储和交换表格数据。它以纯文本形式存储数据,每行代表一条记录,每个字段用逗号分隔。CSV 文件易于生成和解析,广泛应用于数据存储、导入和导出。
1
2
3
4
Name, Age,CityAlice, 30 ,New YorkBob, 25 ,Los AngelesCharlie, 35 ,Chicago
表头(Header) :第一行通常是字段名称(如 Name, Age, City)。数据行 :每行代表一条记录,字段之间用逗号分隔。分隔符 :默认是逗号(,),但也可以是其他字符(如分号 ; 或制表符 \t)。
我们会发现,CSV数据文件阅读起来还是比较麻烦的,(作为存储便捷性的牺牲)我们可以使用Python来帮助我们解析CSV数据并且完成数据的可视化。
CSV in Python:Data Processing 在原书中,作者使用了天气数据作为示范,我们可以来一点更好玩的~
在接下来的篇幅中,笔者将使用Python完成一个简单的机器学习项目——Titanic二分类问题
数据集来源:Kaggle Titanic
在Vscode中新建一个文件夹作为项目主目录,并且下载官方提供的数据集:gender_submission.csv,test.csv,train.csv
先看看官方给我们的要求是什么:
The training set should be used to build your machine learning models. For the training set, we provide the outcome (also known as the “ground truth”) for each passenger. Your model will be based on “features” like passengers’ gender and class. You can also use feature engineering to create new features.
The test set should be used to see how well your model performs on unseen data. For the test set, we do not provide the ground truth for each passenger. It is your job to predict these outcomes. For each passenger in the test set, use the model you trained to predict whether or not they survived the sinking of the Titanic.
We also include gender_submission.csv , a set of predictions that assume all and only female passengers survive, as an example of what a submission file should look like.
通俗来说,就是给了泰坦尼克号上部分成员的数据信息,然后建立自己的机器学习模型预测“ground truth” ,最后提交一份类似于gender_submission.csv的报告(第三份文件只是输出示例,假设所有女人幸存而所有男人牺牲)
Loading Data 我们首先需要读取csv文件中的数据 ,可以使用Python中的csv模块。
1
2
3
4
5
6
7
8
9
10
11
12
13
14
15
16
17
18
19
20
21
import csvfrom pathlib import Pathimport json'test.csv' )'train.csv' )next (train_reader)next (test_reader)print (header_row_train)print (header_row_test)
1 2 ['PassengerId ', 'Survived ', 'Pclass ', 'Name ', 'Sex ', 'Age ', 'SibSp ', 'Parch ', 'Ticket ', 'Fare ', 'Cabin ', 'Embarked ']'PassengerId ', 'Pclass ', 'Name ', 'Sex ', 'Age ', 'SibSp ', 'Parch ', 'Ticket ', 'Fare ', 'Cabin ', 'Embarked ']
接下来,我们将要将数据处理成方便获取的JSON格式。
1
2
3
4
5
6
7
8
9
10
11
12
13
14
15
16
17
18
19
20
21
22
23
24
25
26
27
28
29
train_data_json = []for row in train_reader:for header, value in zip (header_row_train, row)}for row in test_reader:for header, value in zip (header_row_test, row)}print ("训练集 JSON 数据:" )print (train_data_json[:2 ])print ("\n测试集 JSON 数据:" )print (test_data_json[:2 ])with open ('train_data.json' , 'w' , encoding='utf-8' ) as f:2 ) with open ('test_data.json' , 'w' , encoding='utf-8' ) as f:2 )
运行程序,我们就成功的把csv格式的文件存储成为JSON文件!
Data Washing 接下来,我们需要进行数据的预处理,包括处理空缺的数据 等等。
1
2
3
4
5
6
7
8
9
10
11
12
13
14
15
16
17
18
19
20
21
22
23
24
25
26
27
28
29
30
31
32
33
34
35
36
37
38
39
40
41
42
43
44
45
46
47
48
49
import jsonimport pandas as pdimport numpy as np'''Data washing''' with open ('train_data.json' , 'r' , encoding='utf-8' ) as f:with open ('test_data.json' , 'r' , encoding='utf-8' ) as f:'Age' ] = train_df['Age' ].replace('' , np.nan)'Fare' ] = train_df['Fare' ].replace('' , np.nan)'Age' ] = test_df['Age' ].replace('' , np.nan)'Fare' ] = test_df['Fare' ].replace('' , np.nan)'Age' ] = train_df['Age' ].astype(float )'Fare' ] = train_df['Fare' ].astype(float )'Age' ] = test_df['Age' ].astype(float )'Fare' ] = test_df['Fare' ].astype(float )'Age' ] = train_df['Age' ].fillna(train_df['Age' ].median())'Embarked' ] = train_df['Embarked' ].fillna(train_df['Embarked' ].mode()[0 ])'Cabin' ] = train_df['Cabin' ].fillna('Unknown' )'Age' ] = test_df['Age' ].fillna(test_df['Age' ].median())'Fare' ] = test_df['Fare' ].fillna(test_df['Fare' ].median())'Cabin' ] = test_df['Cabin' ].fillna('Unknown' )print ("The loss of train set:" )print (train_df.isnull().sum ())print ("\nThe loss of test set:" )print (test_df.isnull().sum ())
检查输出,说明数据预处理完成。
1
2
3
4
5
6
7
8
9
10
11
12
13
14
15
16
17
18
19
20
21
22
23
24
25
26
27
28
The loss of train set :test set :
这就是第一步储存在JSON的好处,模块化的处理保证了程序员可以独立地执行各部分的程序,如果出错了也可以重新进行Loading Data获得原始数据。
Machine Learning 接下来就是机器学习 的专场了,笔者使用的是随机森林RandomBoost 。
1 2 3 4 5 6 7 8 9 10 11 12 13 14 15 16 17 18 19 20 21 22 23 24 25 26 27 28 29 30 31 32 33 34 35 36 37 38 39 40 41 42 43 44 45 46 47 48 49 50 51 52 53 54 55 56 57 58 59 60 61 62 63 64 65 66 67 68 69 70 71 72 73 74 75 76 77 78 79 80 81 82 83 84 85 86 87 88 89 90 91 92 93 94 95 96 97 98 99 100 101 102 103 104 105 106 107 108 109 110 111 112 113 114 115 116 117 118 119 120 121 122 123 124 125 126 127 128 129 import jsonimport pandas as pdimport numpy as np'''Data washing''' with open ('train_data.json' , 'r' , encoding='utf-8' ) as f:with open ('test_data.json' , 'r' , encoding='utf-8' ) as f:'Age' ] = train_df['Age' ].replace('' , np.nan)'Fare' ] = train_df['Fare' ].replace('' , np.nan)'Age' ] = test_df['Age' ].replace('' , np.nan)'Fare' ] = test_df['Fare' ].replace('' , np.nan)'Age' ] = train_df['Age' ].astype(float )'Fare' ] = train_df['Fare' ].astype(float )'Parch' ] = train_df['Parch' ].astype(int )'SibSp' ] = train_df['SibSp' ].astype(int )'Pclass' ] = train_df['Pclass' ].astype(int )'Age' ] = test_df['Age' ].astype(float )'Fare' ] = test_df['Fare' ].astype(float )'Parch' ] = test_df['Parch' ].astype(int )'SibSp' ] = test_df['SibSp' ].astype(int )'Pclass' ] = test_df['Pclass' ].astype(int )'Age' ] = train_df['Age' ].fillna(train_df['Age' ].median())'Embarked' ] = train_df['Embarked' ].fillna(train_df['Embarked' ].mode()[0 ])'Cabin' ] = train_df['Cabin' ].fillna('Unknown' )'Age' ] = test_df['Age' ].fillna(test_df['Age' ].median())'Fare' ] = test_df['Fare' ].fillna(test_df['Fare' ].median())'Cabin' ] = test_df['Cabin' ].fillna('Unknown' )print ("The loss of train set:" )print (train_df.isnull().sum ())print ("\nThe loss of test set:" )print (test_df.isnull().sum ())'Title' ] = train_df['Name' ].apply(lambda x: x.split(',' )[1 ].split('.' )[0 ].strip())'Title' ] = test_df['Name' ].apply(lambda x: x.split(',' )[1 ].split('.' )[0 ].strip())'Sex' ] = train_df['Sex' ].map ({'male' : 0 , 'female' : 1 })'Sex' ] = test_df['Sex' ].map ({'male' : 0 , 'female' : 1 })'FamilySize' ] = train_df['SibSp' ] + train_df['Parch' ] + 1 'FamilySize' ] = test_df['SibSp' ] + test_df['Parch' ] + 1 'Embarked' ] = train_df['Embarked' ].map ({'S' : 0 , 'C' : 1 , 'Q' : 2 })'Embarked' ] = test_df['Embarked' ].map ({'S' : 0 , 'C' : 1 , 'Q' : 2 })'Pclass' , 'Sex' , 'Age' , 'SibSp' , 'Parch' , 'Fare' , 'Embarked' , 'FamilySize' ]'Survived' ]print (X_train.dtypes)from sklearn.ensemble import RandomForestClassifier100 , random_state=42 )from sklearn.metrics import accuracy_score, confusion_matrixprint (f"训练集准确率: {accuracy:.2 f} " )print ("混淆矩阵:" )print (conf_matrix)'PassengerId' : test_df['PassengerId' ],'Survived' : test_predictions'submission.csv' , index=False )
相关文件将会开源到我的Github上。
结果:clown_face:
Chapter 17 Using API Advanced Techniques
